My Process
Step 1 - Research
I begin my design process with a thorough review of the client or project brief to clearly understand the goals, constraints, and expectations. From there, I evaluate existing solutions and comparable products to identify current standards, gaps, and opportunities for innovation. This phase involves extensive research, including both market research to understand trends, competitors, and user expectations, and client-specific research to align the design with brand values, target audiences, and project objectives.

Step 2 - Interviews
Following my initial research phase, I develop structured interview questions informed by the insights gathered from primary research. These questions are presented to both the client and potential end users who are likely to interact with the type of product being designed. During these interviews, I document responses in detail and analyze the range of perspectives to identify common themes, pain points, and opportunities. The insights gathered from this process are referenced throughout the remainder of the design workflow and play a key role in guiding design decisions at later stages.
Step 3 - Sketching And Ideation
After completing the interview phase, I transition into ideation by exploring concepts through sketching. I begin with a series of rough, exploratory sketches that capture both ideas developed earlier in the process and new concepts generated spontaneously. This initial sketching phase serves as a creative warm-up and encourages broad thinking without constraint. I then revisit my research findings and refine subsequent sketches accordingly, integrating validated insights and selectively incorporating features that proved most promising in earlier explorations. Some of these may also be quick marker renders.


Step 4 - C.A.D.
I then choose a couple of my favorite ideas and 3D model them to get a sense of scale. I start with some quick form models and then go into detailing using trial and error to fine tune the models so i can start thinking about materials.


Step 5 - KeyShot
After C.A.D., I move to KeyShot. This is where I fine-tune materials and details for my final models. KeyShot allows me to play with different materials easily and is one of my favorite tools that I use in my design process. Some of these renders are also used for final presentations.


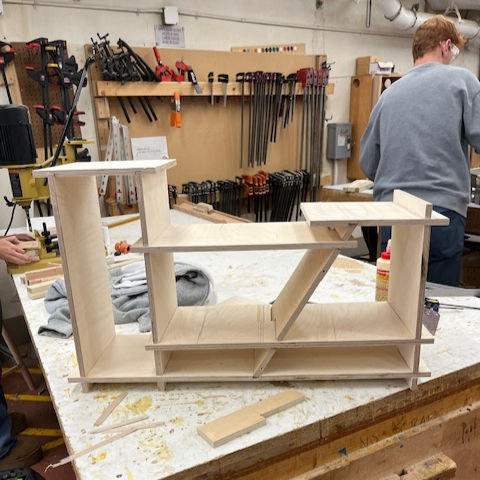
Step 6 - Modeling/Final Product
Finally, the process culminates in the modeling stage, which represents the final and most rewarding phase of my design workflow. At this point, ideas are translated into a tangible form. I begin by sourcing and purchasing the appropriate materials for the build, whether that includes wood, metal, plastic, or 3D-printing filament. These materials are then taken to the appropriate facilities for fabrication and processing, such as a woodshop or fabrication lab. Once each component has been properly prepared, I move into the assembly phase, where the individual parts are brought together, and the project fully takes shape, marking the realization of the design from concept to finished form.